How to replace iPollo V1 mini control board in Ethereum mining operations?
March 16, 2025
How to Replace iPollo V1 Mini Control Board in Ethereum Mining Operations?
Cryptocurrency mining, particularly Ethereum mining, relies heavily on efficient and reliable hardware components to maintain profitability. Among these components, the control board plays a pivotal role in managing the entire mining operation. The iPollo V1 mini control board stands out as a sophisticated solution designed specifically for Ethash algorithm optimization. However, like all hardware, it may eventually require replacement due to wear and tear, upgrades, or unforeseen failures. In this article, we’ll walk you through the process of replacing the iPollo V1 mini control board, ensuring minimal downtime and maximum operational efficiency.
Understanding the iPollo V1 Mini Control Board
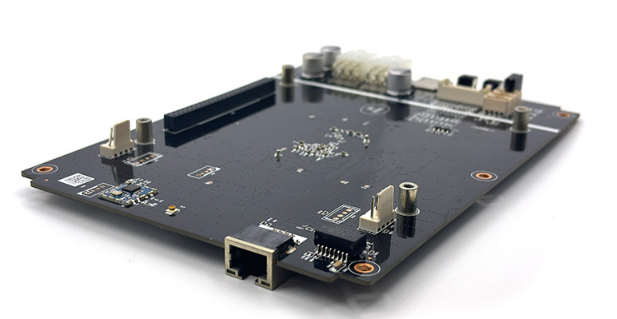
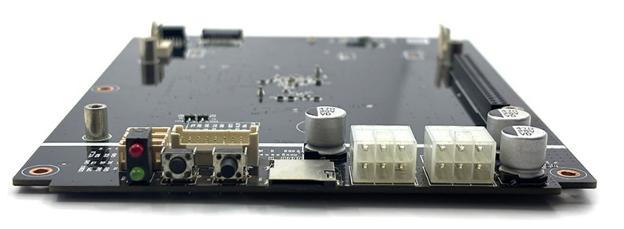
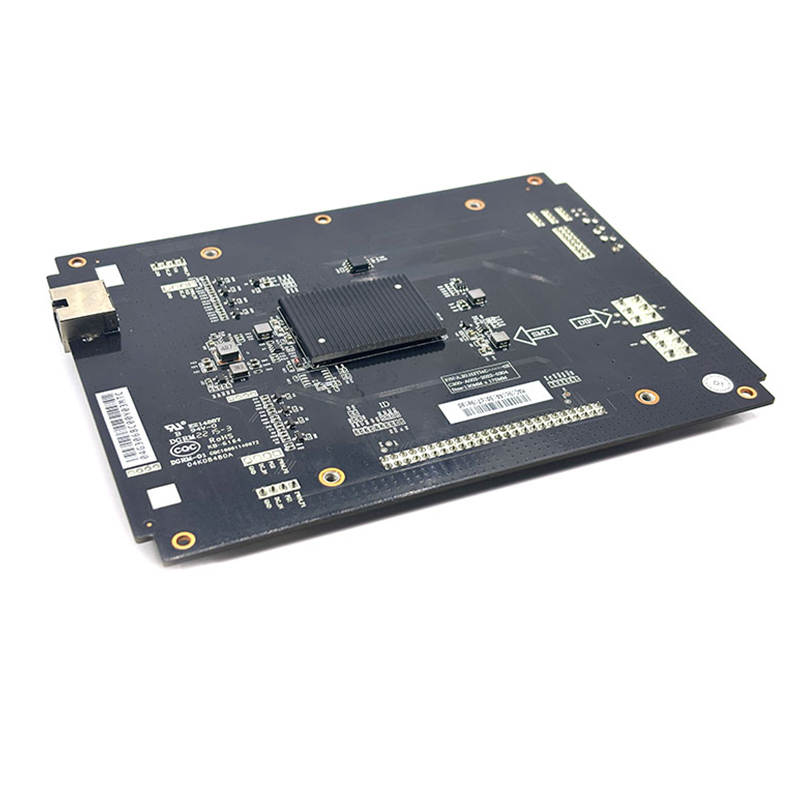
Before diving into the replacement process, it’s essential to understand what makes the iPollo V1 mini control board a critical component in Ethereum mining operations. This board acts as the central nervous system of your mining rig, facilitating seamless data collection and processing from connected hash boards. Here are some of its standout features:
- Data Processing Excellence: The board ensures smooth communication between hash boards, preventing revenue loss due to data transmission issues.
- Optimized Memory Architecture: With a 6.0GB memory configuration and support for a 5.8GB DAG size, it’s perfectly tailored for Ethereum mining.
- Consistent Performance: It delivers a reliable 280MH/s (±10%) hashrate, crucial for maintaining predictable mining output.
- Energy Efficiency: Operating at 220W (±10%), it strikes a balance between performance and power consumption.
- Compact Design: Weighing just 0.5 KG, it’s lightweight yet robust, making it ideal for both small and large-scale mining setups.
These features make the iPollo V1 mini control board a cornerstone of modern Ethereum mining operations. However, when the time comes to replace it, proper preparation and execution are key.

When to Replace the iPollo V1 Mini Control Board
Knowing when to replace your control board can save you from costly downtime. Here are some common signs that indicate a replacement may be necessary:
- Frequent System Crashes: If your mining rig experiences repeated crashes or instability, the control board could be the culprit.
- Reduced Hashrate: A noticeable drop in hashrate performance may signal that the board is no longer functioning optimally.
- Physical Damage: Visible damage, such as burnt components or corrosion, is a clear indicator that replacement is needed.
- Incompatibility with New Software: As mining software evolves, older hardware may struggle to keep up, necessitating an upgrade.
- Age and Wear: Even high-quality components like the iPollo V1 mini control board have a finite lifespan, typically ranging from 3 to 5 years in continuous operation.
If you notice any of these issues, it’s time to consider replacing your control board.
Preparing for the Replacement Process
Replacing the iPollo V1 mini control board requires careful planning to minimize downtime and avoid potential complications. Here’s a step-by-step guide to preparing for the replacement:
- Gather Necessary Tools and Equipment:
- Screwdrivers (typically Phillips and flathead)
- Anti-static wrist strap (to prevent electrostatic discharge)
- Replacement iPollo V1 mini control board
- Thermal paste (if required)
- Cleaning supplies (compressed air, isopropyl alcohol, etc.)
- Power Down Your Mining Rig:
Always turn off and unplug your mining rig before performing any hardware replacements. This ensures safety and prevents damage to components.
- Backup Configuration Settings:
Save your mining rig’s configuration settings, including pool information and overclocking parameters. This will make it easier to restore operations after the replacement.
- Prepare Your Workspace:
Choose a clean, well-lit area with ample space to work. An anti-static mat is ideal for protecting sensitive components.
Step-by-Step Replacement Guide
Now that you’re prepared, let’s dive into the replacement process:
#### Step 1: Remove the Old Control Board
- Open the mining rig’s chassis to access the internal components.
- Locate the iPollo V1 mini control board. It’s typically connected to the hash boards via cables.
- Carefully disconnect all cables and connectors attached to the control board. Take note of their positions for easier reassembly.
- Unscrew the board from its mounting points and gently remove it from the chassis.
#### Step 2: Install the New Control Board
- Position the new iPollo V1 mini control board in the same location as the old one.
- Secure it with screws to ensure it’s firmly mounted.
- Reconnect all cables and connectors, referring to your notes or photos taken during disassembly. Double-check each connection to avoid errors.
#### Step 3: Power Up and Test
- Close the chassis and plug in your mining rig.
- Power it on and monitor the startup process. Ensure that the new control board is detected and functioning correctly.
- Restore your configuration settings and verify that the mining rig resumes normal operation.
#### Step 4: Monitor Performance After replacement, closely monitor your mining rig’s performance for the next 24–48 hours. Check for stability, hashrate consistency, and any unusual behavior.
Operational Insights and Best Practices
Replacing a control board may seem straightforward, but there are several best practices to ensure a smooth transition and long-term success:
- Regular Maintenance: To extend the lifespan of your control board and other components, perform regular maintenance, including cleaning dust and checking connections.
- Use Genuine Parts: Always use genuine iPollo replacement parts to maintain compatibility and reliability.
- Stay Updated: Keep your mining software and firmware up to date to ensure compatibility with the latest Ethereum network updates.
- Invest in Surge Protection: Protect your mining rig from power surges, which can damage sensitive components like the control board.
Why Choose the iPollo V1 Mini Control Board?
If you’re considering upgrading your control board, the iPollo V1 mini is an excellent choice. Its advanced features, such as optimized memory architecture and energy-efficient design, make it a future-proof solution for Ethereum mining. Additionally, its compact size and WiFi connectivity offer flexibility in deployment, whether you’re running a small home setup or a large-scale mining farm.
Conclusion
Replacing the iPollo V1 mini control board is a manageable task with the right preparation and execution. By understanding its role in your mining operation and following the steps outlined in this guide, you can ensure a seamless transition and maintain the efficiency of your Ethereum mining rig. Remember, investing in quality components and regular maintenance will pay dividends in the long run, keeping your mining operation profitable and sustainable.
Whether you’re a seasoned mining operator or new to the field, the iPollo V1 mini control board is a reliable choice that delivers performance, efficiency, and peace of mind.